Cast Concrete and Succulents

IMG_0572

As many of you know, I recently completed funding for a Kickstarter project. As part of fulfilling the orders, I’ve been making lots of plaster molds. The problem with mold-making is that you have to wait about a week for molds to dry before using them. So in the downtime waiting for my most recent mold to dry, I’ve been experimenting with casting concrete. I have a hunch that I’ll be able to make bigger self-watering pots with concrete, but I’ve got to learn how to use the material first.

Most of my prototypes so far are pretty ugly and / or structurally unsound. But I kind of like these miniature pots. They seem like especially good matches for mini succulents and my baby air plant pups. They’re a far cry from self-watering pots big enough for windowsill herbs, but it’s a start . . .

Using ORTA seed starters for cuttings

IMG_9203

Inspired by a plant in the neighborhood, I decided to try my hand a propagating plants via cuttings a few weeks ago. It’s a great technique to know, as most herbs are best propagated by cuttings rather than seeds. I’d been reluctant to try though, because I heard it was very hard. You absolutely can’t let cuttings dry out — they have no roots at first! Well, I thought, Orta pots solve this problem for seedlings, maybe they’ll work for cuttings too . . .

I took six cuttings from a big hardy perennial that grows happily all over my neighborhood. I’m not sure what it’s really called, but I call it Library Plant, because there is a lot of it growing out front of the local library. It has big pretty purple and pink flowers in a cone shape, and seems to do well with neglect, which means it might survive on our non-irrigated parking strip (if it survives the propagation process first).

The picture below is me planting the cuttings with rooting hormone into a Deep Six seed starter on July 16th. (I followed the great tutorial at Root Simple, here.) You can see that the lower left cutting had just six leaves when I planted it. The picture above is of the same cutting now, about three weeks later, and it has 12 leaves! So far all six cuttings are still alive, with 5 of them sporting new growth.

IMG_0528

I also tried propagating a chocolate mint plant. Chocolate mint is like peppermint, in that it doesn’t grow true from seed. You have to clone it with cuttings. Reading about mints, it seemed that they’re very easy to propagate, even without rooting hormone. So I did an experiment and used rooting hormone on only half the cuttings. You can see the result, below (rooting hormone on the left, no hormone on the right). The ones without the hormone are smaller, and only 2 out of 3 survived. The ones with hormone are all thriving and ready for transplant.

IMG_9204
IMG_9208

Inspired by these successes, I planted a dozen more cuttings yesterday. Pictures and details about planting cuttings after the break.
Continue reading

Experiment: Root-bound Tomatoes

IMG_9105

After returning from the Dwell on Design show, I had a Deep Six seed-starter full of root-bound tomatoes (one of them is the “Older Plant” above). I left them in their pot for display at the show, otherwise, I would have transplanted them out several weeks earlier. I also had a Deep Six full of tomatoes that were just the right age for transplant (that’s the “Younger Plant” above). I transplanted one of each to 4″ pots to see how much difference being root bound in a seed-starter makes to the adult plant. I’ll post updates as the plants grow.

IMG_9101

Sometimes it’s helpful to use a plastic plant marker to remove seedlings from the deep six. Just go around the edges like loosening a cake from a pan.

IMG_9102

This is the younger plant being pulled from the seed-starter (after some loosening). You can see that the soil is still loose around the roots. It’s not at all root-bound.

IMG_9103

This is the older plant, with tons of roots wound tightly around the soil.

Unorthadox Carrots: Update

IMG_9084 IMG_9090

I’ve transplanted the carrots I started in seed-starters and posted about several weeks ago.  You can see in the picture above  that the seedling already has a well-developed tap root running straight down the root-ball.  I planted a dozen carrot seedlings in a dappled sun bed in the back yard about 2 weeks ago.  I also mulched the bed with some home-made worm compost, and leaves from our oak tree, and installed a drip line for irrigation.  They’re still all there and going strong!  They must have been big enough that the critters couldn’t eat them down to the ground.  I’ll post more updates as I have them.

Recipe: Pesto

IMG_0448

It’s pesto season! For those of you with basil in the yard, or bringing home big bunches from the farmer’s market, here is an easy and delicious way to enjoy it:

(quantities are all flexible – after you’ve made it a few times, you’ll start to know what proportions taste best to you)

1 bunch basil, about as much as you see in the picture
1 small clove garlic, minced finely
1/2 cup grated parmesean cheese
2-4 tbsp olive oil
1-2 tbsp pine nuts
salt to taste

Throw everything in the food processor and process until the ingredients are all finely chopped and evenly mixed. You can put the pesto on anything that tastes good to you, but I like it on pasta. If you’re putting it on pasta, add a bit (2 – 4 tbsp) of the hot pasta water to the pesto and mix before adding the pesto to the pasta. That extra bit of water makes a delicious creamy sauce.

Makes enough sauce for 2-4 pasta servings.

Unorthodox Carrots

IMG_0483

I have bad luck growing carrots the “normal” way: direct seeding into the garden. The tender little sprouts are a tasty treat for critters (slugs, I suspect). Lots of carrot seeds germinate and sprout in my garden, but disappear after about a day or two. So I’m trying to start them in seed-starters first to see how it goes. Maybe if they get a bit bigger before doing battle with the critters, they’ll make it. Then again, maybe conventional wisdom will be right – my carrot seedlings may hate being transplanted. We’ll see . . . I’ll post an update when I know more.

Science Experiment Update

fert no fert2

The data are in! It’s been about 2 weeks since I first posted the fertilizer experiments.  As you can see, the tomato starts on the fertilized side of the pot are much bigger than on the other side.

What’s really interesting to me though, is the difference in the roots. About a week ago, I thinned out the starts to leave just one plant per pocket. I took pictures of each little start as I pulled them out. At the time, the leaves of the different starts looked about the same, but the roots were extremely different. The fertilized starts had much bigger, healthier root systems. (By the way, in case you’re worried about the welfare of the thinned out starts, I replanted all of them in a new seed starter, and they’re still alive and thriving today.)

fert no fert roots2
 

The conclusion seems pretty clear: a bit of fertilizer leads to happier baby plants. I’ll be mixing it in from now on. Next experiment: testing various concentrations and types of fertilizer.

Recipe: Pasta e Fagioli (Pasta with Beans)

IMG_0293

I love Italian cooking shows. I don’t really speak Italian, but it’s still pretty easy to follow along because they show everything as they go along, saying the name of the vegetable as they cut it, etc. One of my favorites is Cucina con Ale. And one of his recipes that I make all the time is Pasta e Fagoli Veloce, or Pasta with Beans, Fast.

Traditionally, Pasta with Beans is a slow, all-day kind of affair. The “veloce” version makes a quick, hearty, very tasty meal. (Not to mention a convenient vegetarian protein, which is always a challenge in our house.) I’ve made some changes to Ale’s recipe, the biggest one being to eliminate the ham. We’re not necessarily vegetarians, but most of the time it’s easier and cheaper to cook that way. Adding ham with the vegetables at the beginning of the recipe is pretty tasty, though.

Here’s the recipe for 2 hungry people:
(Proportions and quantites are fairly flexible, as suits a throw-it-together type of recipe.)

1 onion
1-2 carrots
1-2 sticks of celery
1-2 bay leaves
1 tbsp tomato paste
1 can of beans (white beans are best, but black, or pinto are also good), drained and rinsed.
200 grams of pasta (about 1/2 a regular 1 lb bag)
Salt for the pasta water (about 1 tsp), and to taste

1. Start your water boiling for the pasta, and salt it.
2. Chop the onion, carrots, and celery fine and sautee them on medium-low heat with the bay leaves in a pan big enough to eventually hold the cooked pasta.
3. When the water boils, start cooking the pasta and check the time. We’re going to drain the pasta early, so keep an eye on it.
4. Once the onion, carrot, celery mix has softened, after about 5 minutes, add the drained beans, about 1/2 cup of the pasta cooking water, and the tomato paste. Stir and simmer while you wait for the pasta.
5. When the pasta is soft on the outside, but still crunchy in the middle, drain the pasta, saving the water it cooked in. Add the pasta to the pot with the veggies and beans, then add enough of the cooking water to make it soupy, about 1/2 – 1 cup. Simmer and stir occasionally until the pasta has absorbed the water and tastes good to you.

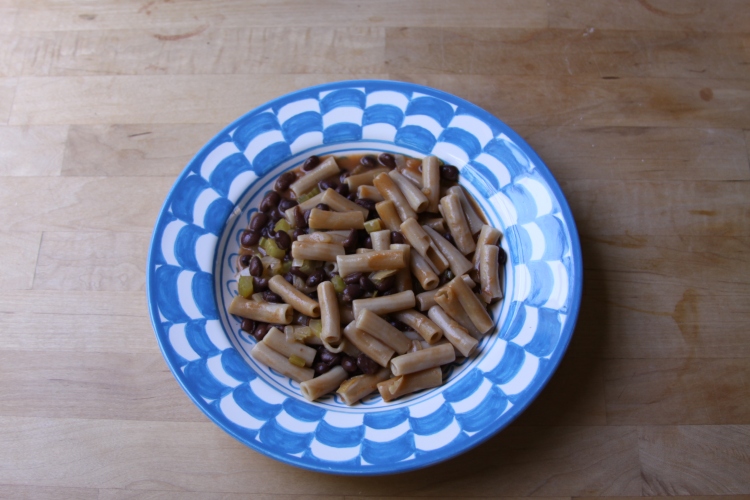
Serve with grated parmesean and enjoy!

Science Experiments

IMG_0283

I’m doing an experiment to test whether a teeny bit of fertilizer helps or hinders seedlings in Orta pots.  You can see that I’ve labeled one side of the pot “Fert.”  The three pockets on that side of the pot have a bit of organic fertilizer added to the potting mix (about a teaspoon of organic fertilizer to a quart of seed starting mix).  The other three pockets just have the basic seed-starting mix that I make from a recipe I learned from Root Simple, a mix of coconut coir, perlite, and worm castings.  You can find their original post here.

They suggest watering seedlings with a very dilute solution of fertilizer when the seedlings are about 3-4 weeks old.  Because Orta pots wick water through terracotta walls instead of being watered from above, I thought the seedlings might be happier with a bit of fertilizer already in the seed mix.  In another posting, I’ll test what happens if you put dilute fertilizer solution directly into the water reservoir.  Will the nutrients pass through the terracotta?  That’s a question for another time.  For now, I’ll keep you updated about what happens with these little guys.